is a blog about design, technology and culture written by Khoi Vinh, and has been more or less continuously published since December 2000 in New York City. Khoi is currently Principal Designer at Adobe. Previously, Khoi was co-founder and CEO of Mixel (acquired in 2013), Design Director of The New York Times Online, and co-founder of the design studio Behavior, LLC. He is the author of “How They Got There: Interviews with Digital Designers About Their Careers”and “Ordering Disorder: Grid Principles for Web Design,” and was named one of Fast Company’s “fifty most influential designers in America.” Khoi lives in Crown Heights, Brooklyn with his wife and three children.
For about as long as I’ve had broadband in my home I’ve used Speedtest by Ookla to test the speed of that connection. The web-based version of this tool allows you to create an account and save a history of your results, but the iOS versions do not. So I cooked up a script to do just that using Workflow. It’s one result of weeks of continued, after hours tinkering with this amazing iOS automation app—I first wrote about it after the holidays when I had lots of free time to play with it, but I’ve found it so compelling that I still play with it all the time even as my schedule has gotten busy again.
Unfortunately my workflow does not save results from Speedtest’s iPhone or iPad app to the official Ookla account. Instead, it uses a Zapier webhook to record the results in a Google spreadsheet (using a technique I learned from Federico Vitucci at MacStories). As such it requires a little bit of setup—it’s not complicated, but it some visual aids help. Before you get started though, you’ll need to have Workflow (obviously) and Speedtest by Ookla installed on your iOS device, as well as a free Zapier account and a copy of this Google Sheet document in your Google Drive.
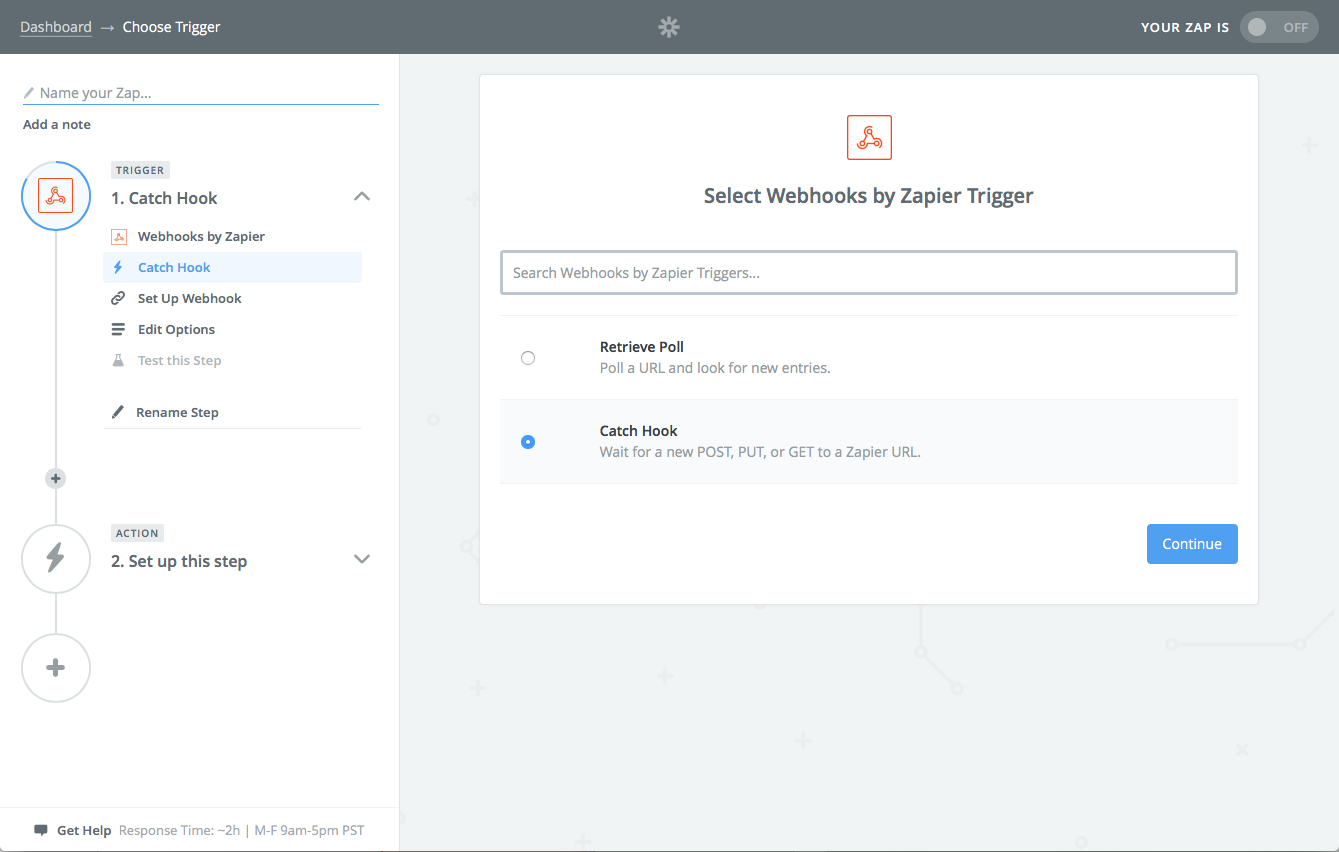
To get started you first create a new Zap in Zapier. To set up the trigger portion of your Zap, select the app “Webhooks by Zapier.” There are two options: Retrieve Poll and Catch Hook; select the second one.
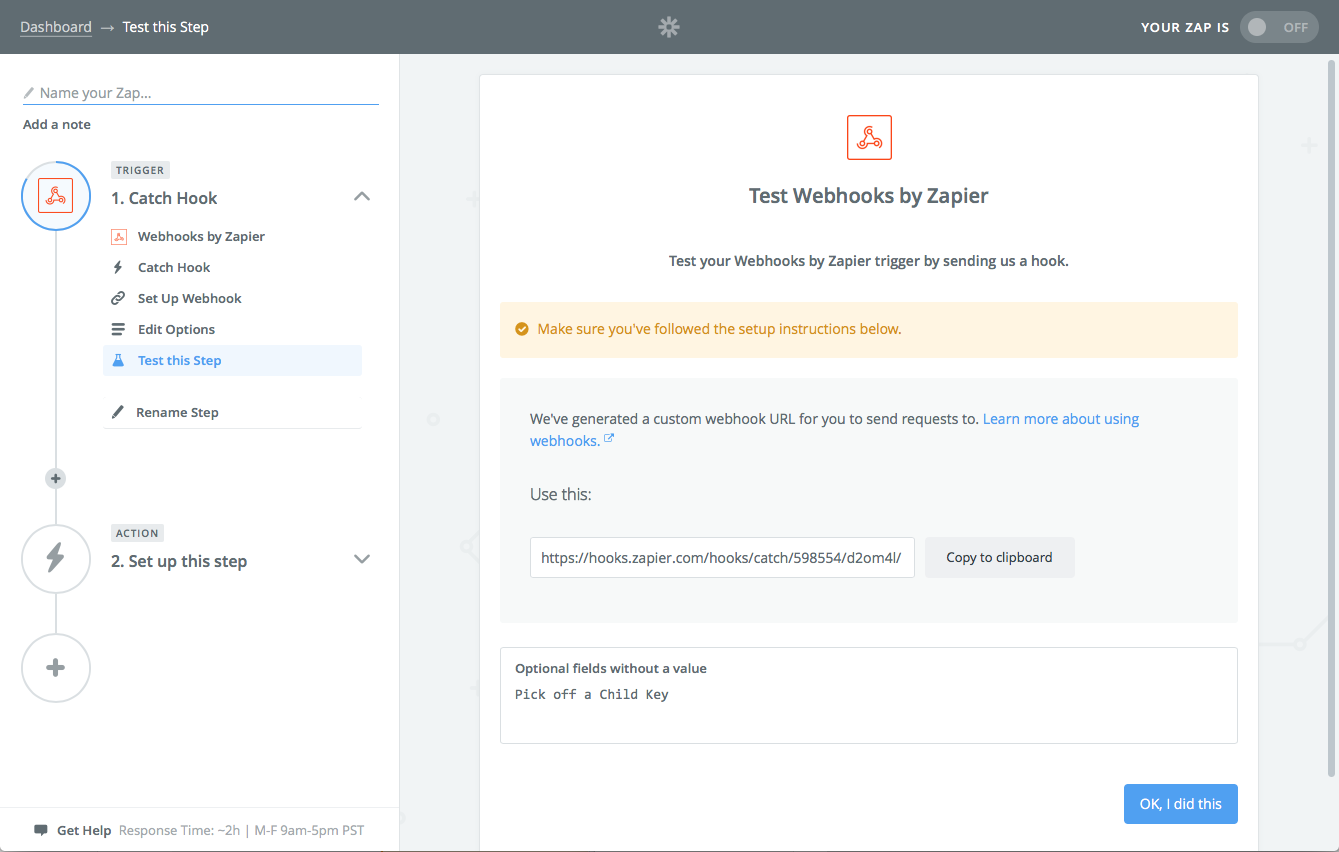
The next step asks you to specify a Child Key to pick off—you can ignore this one. After that, you’ll see a step that will let you test the setup to confirm it’s working.
Notice that that screen contains a unique URL for your webhook. Copy it and save it for later; you’ll need to add it to the workflow itself in the app later.
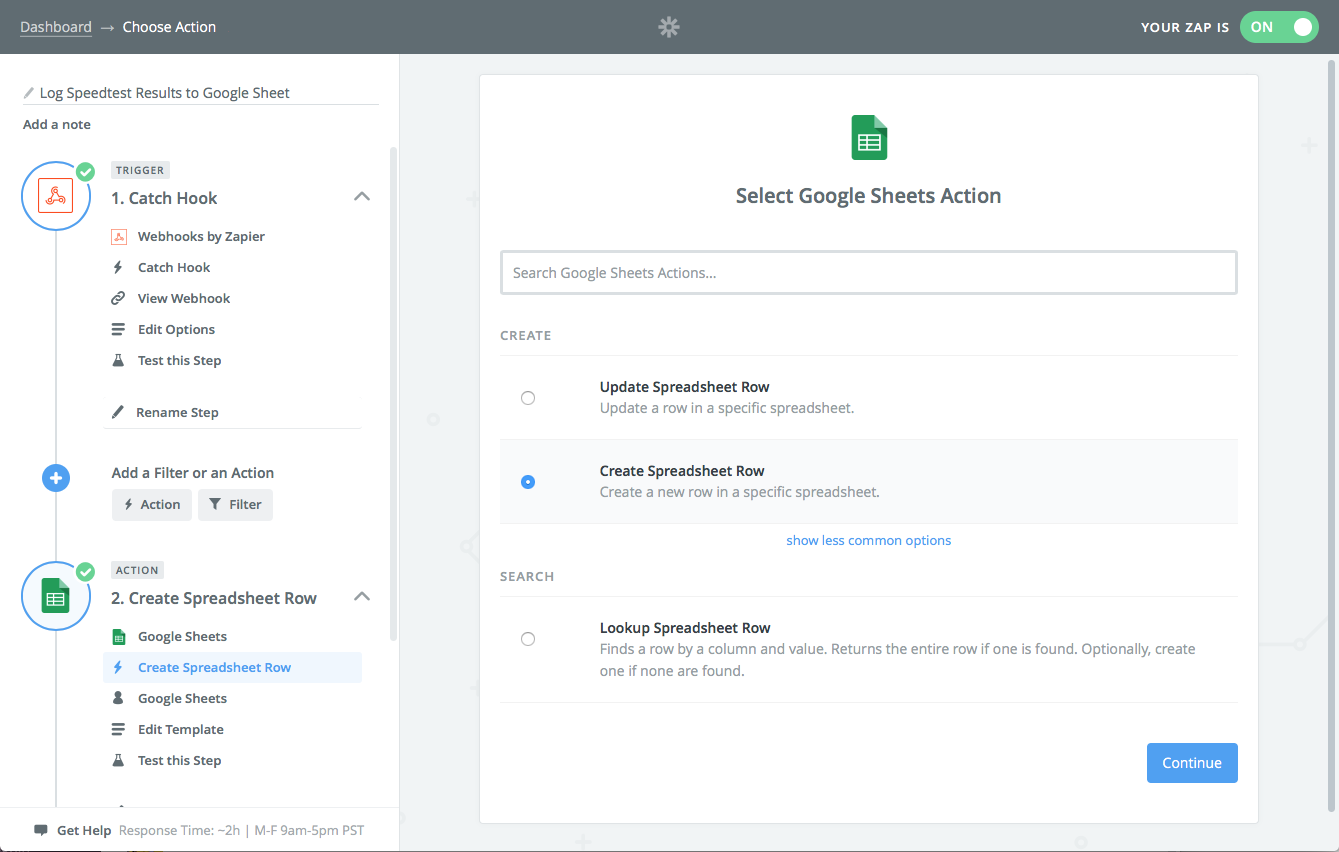
Now set up the action portion of your Zap by selecting Google Sheets. After you do that, you’ll select the option “Create Spreadsheet Row.”
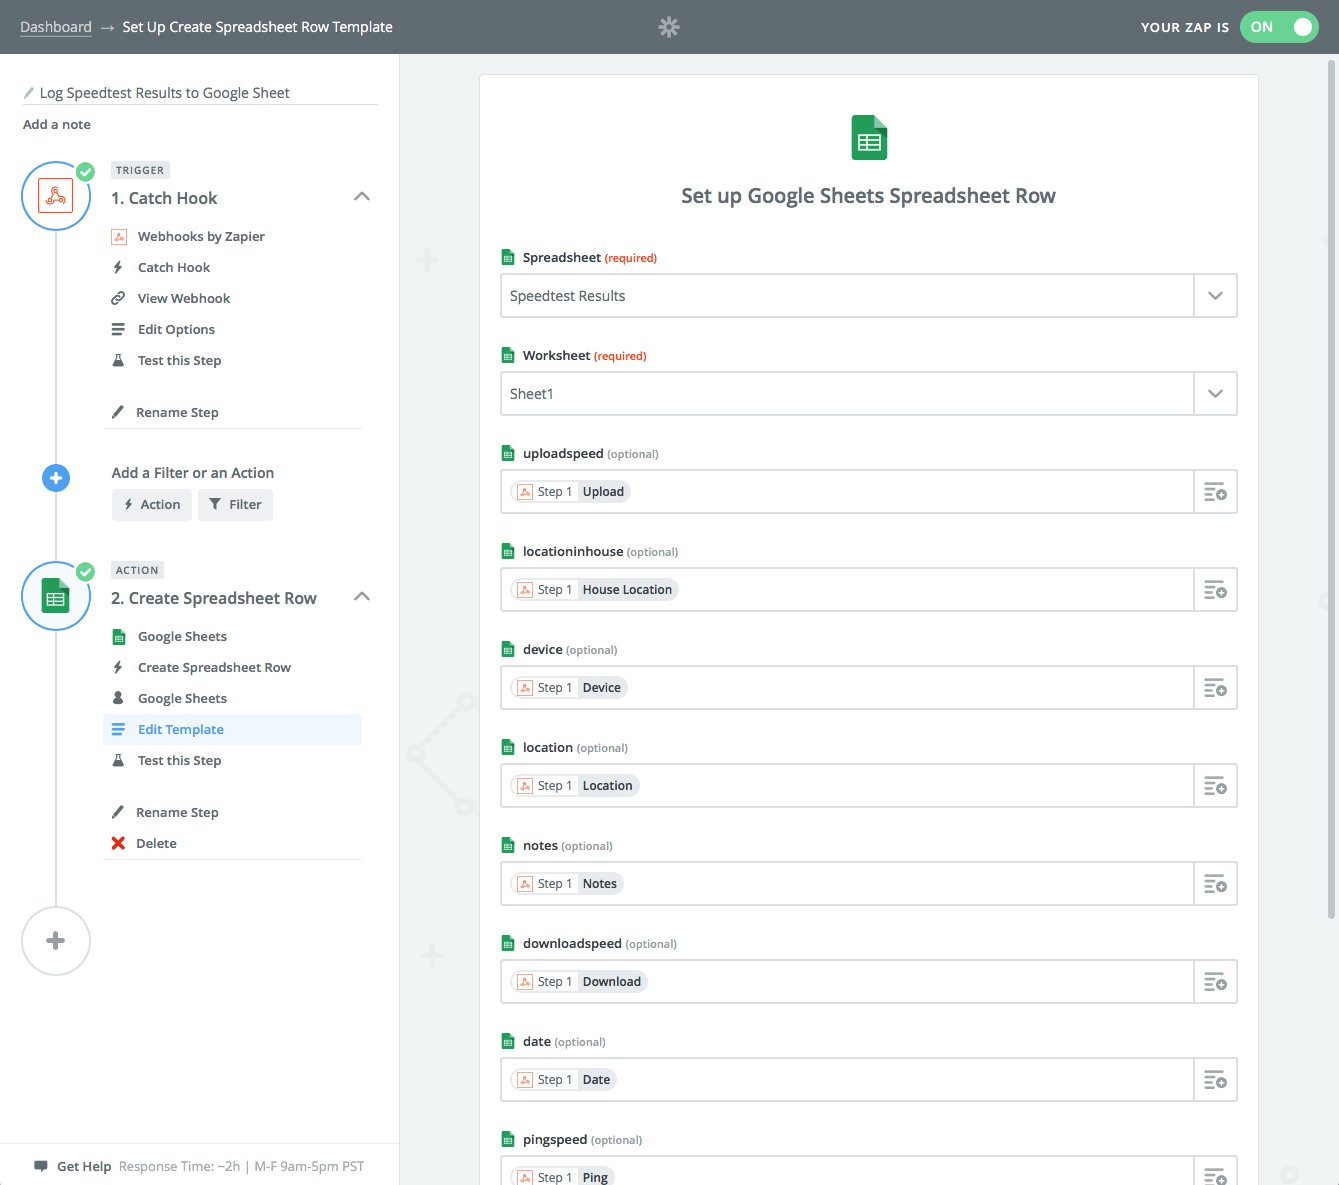
At this point you’ll need to match the data that the workflow passes along to Zapier with specific columns in the Google Sheet. The names are the same, so it should be pretty self-evident.
Once you’re done you can test that action. If everything goes smoothly, you’ll get a row of sample data in your Google Sheet, which you should feel free to delete.
The next step is to acquire the workflow itself, which you can get at this link. Open it in a browser on your iOS device and click “Get Workflow,” which will open it in the app. You’ll then be asked to paste the unique URL for the webhook that I mentioned above; once you do that, the workflow is good to go.
To actually use this, open up the Speedtest app and run a test. When it’s done and the app presents its results, tap on the Share icon, tap on “Run Workflow” from the resulting share sheet, choose this workflow and run it. In addition to saving the technical results of the test, the workflow allows you to specify a room in your house where the test was taken and add any notes that you might wish to attach to those results. Once the workflow has completed its execution on your device, it should just take a moment or two to save the data to Google Sheets. Special bonus if you have a free account: most Zaps only get executed every fifteen minutes or so unless you’re a paid Zapier user, but this one will run more or less instantaneously for everyone.
It does take some persistence to get the hang of Workflow, but hacking together scripts like this has been immensely satisfying for me. I’m just so impressed by the app’s elegant balance of power and accessibility; its drag and drop interface is truly a wonder. If you’re at all interested in using your iPad or iPhone for productivity, it’s well worth spending some time with this app.